Testing React applications with wallaby.js
Wallaby.js is a continuous test runner. It runs your tests as you type and displays various results right inside your code editor. Wallaby.js allows you to test your React applications and get an instant feedback from your tests, no matter how large your codebase is and whether you are using browser environment or node.js with jsdom. With wallaby.js, you can use any popular testing framework of your choice.
In this article I will describe how to test React application, specifically React components, using Jasmine and wallaby.js with code coverage, including code coverage inside JSX element JavaScript expressions. You can find the full code in this repository.
First, if you haven’t done it already, go ahead download and install wallaby.js. Then clone this repository from WebStorm or command line, open the project and install dependencies.
git clone https://github.com/wallabyjs/wallaby-react-component.git
npm install
Next, create wallaby configuration file for your project. It is pretty straightforward, especially if you have used something like Karma before. You can name it wallaby.js and put the following code into it:
module.exports = function (wallaby) {
  return {

    files: [
      {pattern: 'node_modules/react/dist/react-with-addons.js', instrument: false},
      'assets/**',
      'src/**'
    ],

    tests: [
      'test/**/*Spec.jsx'
    ],

    compilers: {
      '**/*.js*': wallaby.compilers.babel()
    }
  };
};
In the configuration file, we have specified the list of our application files and tests using glob patterns. We are also setting up a compiler to convert jsx files code to ES5 (so it can run in browser) using react tools.
Other configuration options and the full format of wallaby.js configuration file is described in wallaby.js documentation.
We are ready to go now - start wallaby.js run configuration using Run menu or keyboard shortcut.
When starting for the first time, wallaby.js will download and install some dependencies. Those include node.js, that is used to run wallaby.js, and PhantomJs headless browser engine to run your tests in. The installation may take a minute or so and only happens once.
After the start, wallaby.js displays its tool window at the bottom:

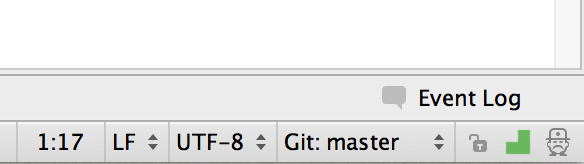
and its status indicator at the right bottom corner of the window.
The indicator displays a spinner when your tests are running, red icon if any of the tests is failing and green icon if all tests are passing. The tool window Failing tests tab displays the information about failing tests, such as error stacks and failed expectation details.
Once started, you don’t need to restart wallaby.js run configuration to run your tests, as it does it automatically, as you change your code. You can hide the tool window by using the Hide icon in its right top corner, as you will be getting the information about failing tests right in the context of the code that you’re editing. You can always get the tool window back by clicking wallaby.js status indicator.
Now, let’s see wallaby.js in action. This project contains a sample implementation of a composite user profile control
var UserProfile = React.createClass({
  render: function() {
    return (
      <div>
        <ProfilePicture username={this.props.username} />
        <FollowButton username={this.props.username} />
      </div>
    );
  }
});
that displays a user picture
var ProfilePicture = React.createClass({
  render: function () {
    return (
      <img src={'assets/' + this.props.username + '.jpg'}/>
    );
  }
});
and also has a “Follow” button that displays user name and changes its text when clicked.
var FollowButton = React.createClass({

  handleClick() {
    this.setState({text: 'Unfollow'});
  },

  render() {
    return (
      <p onClick={this.handleClick}
        className={this.state ? 'unfollow' : 'follow'}>
        {this.state && this.state.text
          || 'Follow ' + this.props.username}
      </p>
    );
  }
});
Now, let’s open the application spec test/avatarSpec.jsx.
'use strict';

var testUtils = React.addons.TestUtils;

describe('User Profile', () => {

  var instance;

  beforeEach(() => {
    this.container = document.createElement('div');
    document.body.appendChild(this.container);
    instance = React.render(<UserProfile username='Homer' />,
                            this.container);
  });

  afterEach(() => {
    document.body.removeChild(this.container);
  });

  describe('Follow button', () => {

    it('should display user name', () => {
      expect(instance.getDOMNode().textContent).toBe('Follow Homer');
    });

    it('should change its text to "Unfollow" when clicked', () => {
      testUtils.Simulate.click(
        testUtils.findRenderedDOMComponentWithTag(instance, 'p'));

      expect(instance.getDOMNode().textContent).toBe('Unfollow');
    });
  });

});
We are testing that the “Follow” button works as expected by rendering a user profile, checking the button text, clicking it and checking its changed text.
When wallaby.js is up and running, you should be able to see coverage indicators in the gutter of the code editor in your tests and other source files.
- Gray square means that the source line is not covered by any of your tests.
- Green square means that the source line is covered by at least one of your tests.
- Yellow square means that the source line is only partially covered by some of your tests.
- Red square means that the source line is the source of an error or failed expectation, or is in the stack of an error.
- Pink square means that the source line is on the execution path of a failing test.
On any line of the source code you can hit Alt + Enter (or use the light bulb icon) to display the list wallaby.js context actions. You can read more about all actions in the documentation.
For this example, let’s mute one of the tests. The easiest way to do this is to change it test function to xit. This will make Jasmine to ignore the test.
As you can see, wallaby.js immediately executes the test and marks the test lines with gray markers, because they are not executed anymore. It also changes src/components/FollowButton.jsx file indicators.
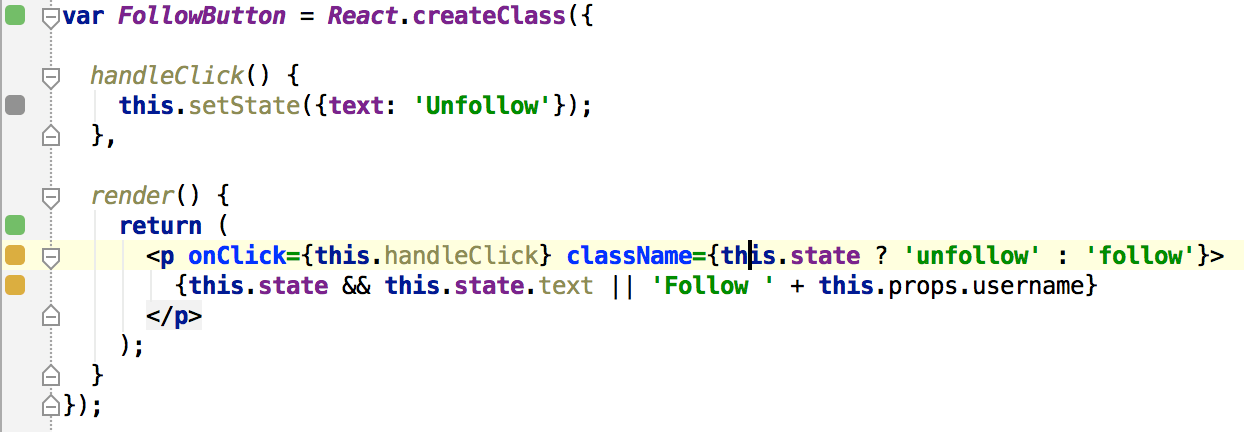
We can also see that handleClick function is not invoked anymore, so it has a gray indicator next to it. We also see yellow indicators next to the JSX element JavaScript expression lines of code. It means that the expression code is only partially covered by our tests. To know what exactly is NOT covered, let’s hit Alt + Enter and use ‘Show file uncovered regions’ context action.
Now we clearly see what is exactly not covered inside the lines with the yellow coverage indicator. Because we have muted the test that was clicking the button, unfollow CSS class is not assigned to the button tag and because handleClick function is not invoked anymore, this.state is undefined so this.state.text is never evaluated and not set as the button text.
Wallaby.js tracks coverage for logical expressions and conditional operators, as you may see it supports JSX as well (and ES6 and many more technologies).
Using wallaby.js context actions you can quickly jump to the failing test or the error source, display tests that are covering some particular line of code, inspect console.log output of each individual test, full error stacks and expectation errors, and much more.
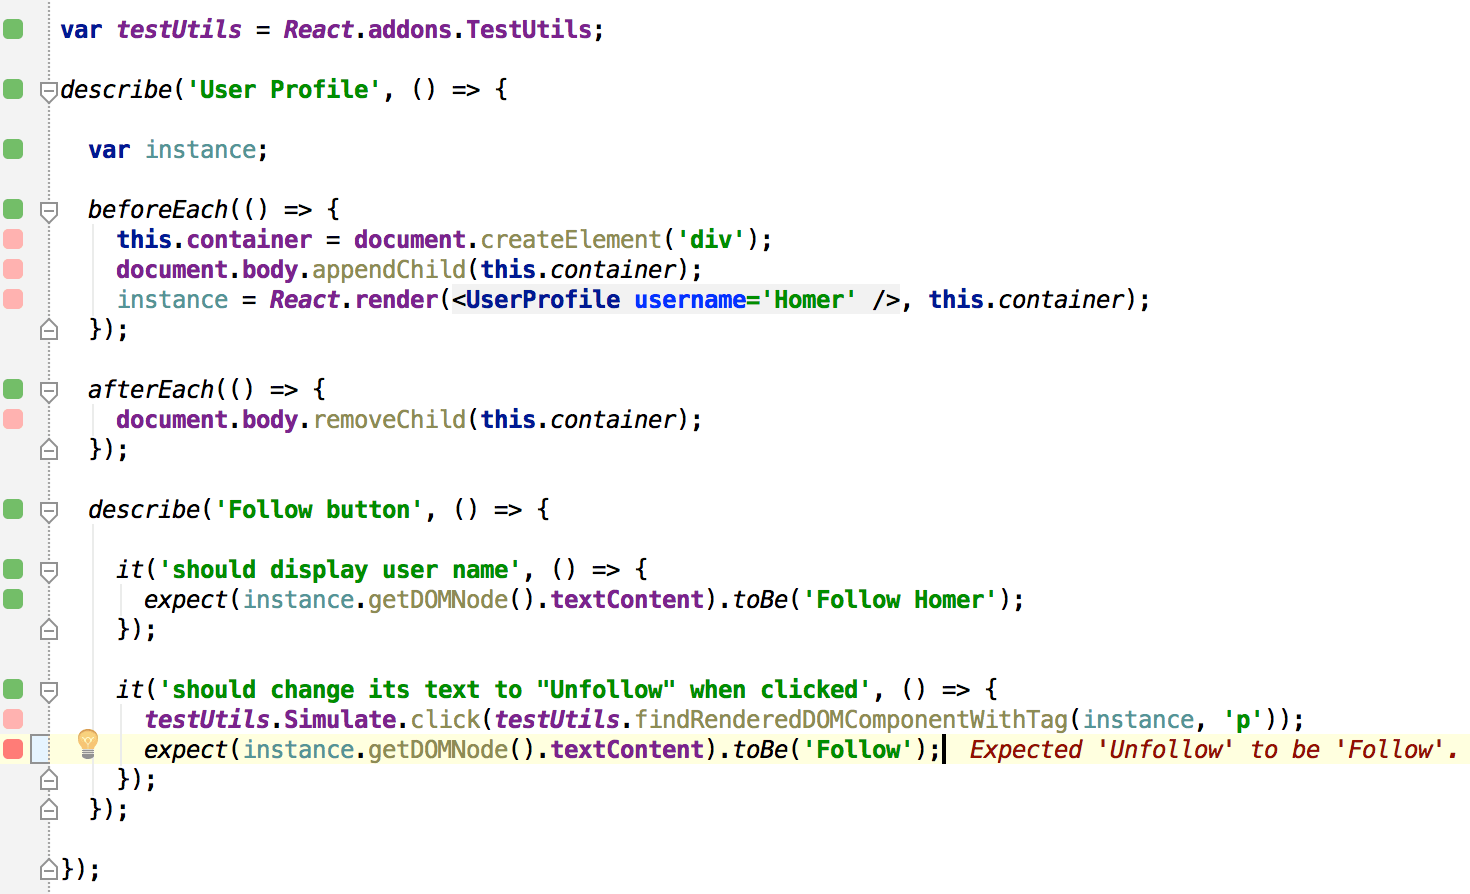
Let’s try to make one of our tests fail:
Immediately as we do so, wallaby.js displays the expectation error right where it occurs. The test path line indicators become pink, the source of the error line indicator is now red.
Apart from displaying errors, where and when they occur, wallaby.js also displays console.log output in a similar manner, so if you’re a fan of console.log, wallaby.js can make you very productive. Now you don’t have to leave your editor anymore to console.log all the things.
Finally, if you would like to see what is actually displayed when wallaby.js runs your tests, you may use “Show last screenshot” context action to get a realisation that your app is not just a bunch of components but is something alive.
Please note, that you have to run a test, that you’d like to see a screenshot for, by using “Run scope test(s)” action within the test first. The reason is simple - normally you have many tests and there’s also some tear down code in the afterEach function. However, when you run one specific test, wallaby.js makes a screenshot before the tear down code is executed.
That’s it for the blog post, thanks for reading and hope it helps you to get started with wallaby.js in your React project. Follow us on twitter to stay updated.